Changing the Body Shape
- n1013315
- Oct 5, 2022
- 3 min read
Updated: Oct 18, 2022
Fat Suit

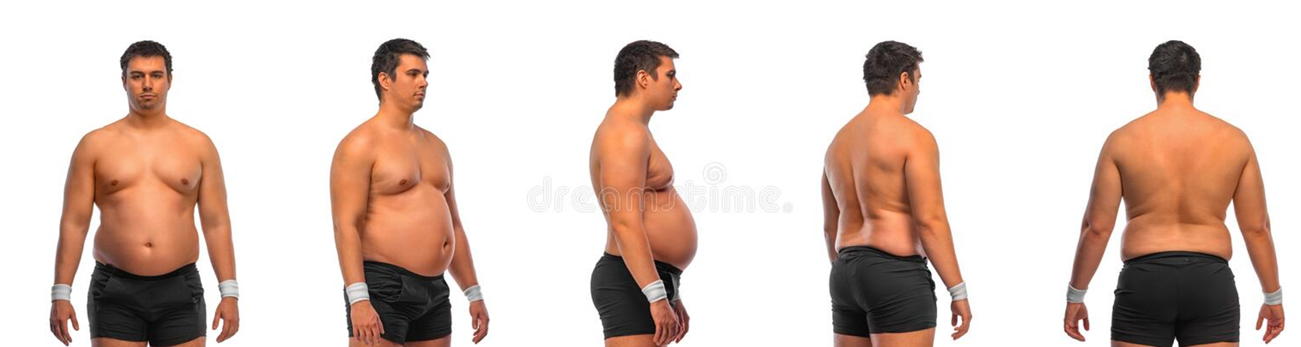


Instruction on how to drape the tabard part of the fat suit, this is what the padding is fixed onto.

Then using a reference image i padded out my tabard using a reference image to see were the weight would lie on a body. This was then tacked down before being covered with a layer of lycra. i discovered that you needed to stretch the lycra so that is was fairly tort over the wadding, to keep everything in place. However, this squashed the padding down a lot, so in future if I'm making one I will make sure to add extra padding to make up for the volume lost when covering it. If I had more time I would of unpinned the lycra after draping its shape then machine sew the side and shoulder seams, allowing the piece to have more strength.


Farthingale Skirt
History of the Free Standing Skirt
There are two main types : boned fabric (boning sewn into fabric), boned cage ( mostly flexible tape running vertically, and stiff boning running horizontally).
They practically started with the Spanish Farthingale, supported with a bum roll.
Drum/ wheel/ French Farthingale was favoured by Elizabeth 1, which is supported with a bum roll.
17th century, this style isnt really favoured.
18th century flat front and back, a Panier.
Late 18th century double pocket Panier, less dramatic.
19th century sleeves were supported by boning and tied with shoulder straps to corset.
Victorian crinoline - most frequent was the cage, strip of fabric at feet to stop wearer tripping over, normally made shorter than the skirt to stop it pocking out from under the skirt.
1870s- bustle- horse shoe shaped boning at the back, tapes pulling it in at the front, ruffle at the bottom to help hide ridges and plump up skirt.
Revived with the Robe de Style in the 1920s
1950s big skirts, sometimes bottom hoops, mostly layers of ruffled fabric.
To create the farthingale we created a boned cage, then draped the fabric over the top to create the pattern pieces. The benefit of this method is that you can move the boning around until you get your preferred skirt shape, you can also change up the circumference of the boning until it is to your satisfaction. Once you have sewn your skirt together you can deconstruct your cage and use the boning to stiffen the fabric of your skirt, where you now have accurate boning channels sewn. Overall I am pleased with the look of my skirt but not with the sizing as it is too big round the waist of my half sized mannequin. I realised his is because I drew each panel encompassing the outside of the tape instead of drawing the vertical lines down the middle of the tape. I originally did this as I thought it may become too small, and you can always fix garments that are too big fairly easily. I didn't have time to alter my skirt, however I know exactly where I went wrong so will be able to complete an accurate one in the future.


Tips:
You can use the height from bust to floor as the diameter of a large hooped skirt.
Make sure to mark the pattern piece edges down the middle of the tape.
You can find average measurements of a figure in some pattern books, helpful in finding a mannequins height.
Corsets and Stays
Stays is the term used to describe a fully boned bodice which was worn from the late 16th century until the end of the 18th century. Before this time (Elizabethan) era they were called a 'pair of bodies' for the two parts. From the 19th century they have been called a corset.

Notes on how to drape a corset.


I found the process of draping each piece of the corset fairly okay to do. However I found that my pattern pieces didn't look exactly like they did on the image I was working from, as they had to be different to stop it being baggy on my mannequin. I'm not sure if this will make a difference to the shaping element of the corset, but I will discover this by the end of this project, and can learn from any issues I have.


Once I had my pattern pieces with the boning marked on them I sewed them together. When I checked the fit on the mannequin I realised I wanted more curve to it, so made the third panel curve in more dramatically to give the appearance of a cinched waist. I then used external boning channels like in my reference photo. I decided on red bias tape so that the boning would become a feature. I used this tape to bind the edges also. I'm pretty pleased with how my corset turned out, and am interested with how it would work out making one for a real person, this is something I want to investigate in the future.


Comments