Breeches Inspired by Comedia Del Arte
- n1013315
- Jan 16, 2022
- 6 min read
Updated: Apr 6, 2022
Comedia Del Arte
Italian comedy
Started in 1500
Stereotypical, singular characters
Masks are an integral part
Fast pace
Interactive with audience
Often street performances
British version is panto
Always the same story line
Making
First I created a basic, modern, block trouser pattern, using my partners measurements. I created the front pattern piece first before tracing this and then using it to draw the back piece. This allowed me to get the same curves and gradients on both pattern pieces, meaning they should fit together better.


2. Then I converted the trouser pattern into a recency breeches pattern. The difference between these two patterns are that you add more fullness to the back pieces as this would need to be saggy to allow for horse riding etc. Also they are tapered in so they are fitted at the knee and the calf. In a traditional pair of regency breeches there would be a flap fastening at the front, which I am going to have a go at doing for the first time.

3. To do this I made slices into my back pattern piece allowing me close up the darts|< the drew a curved line from the edge of the crotch and waist to add the extra fullness, as well as tapering in the knee. I then used this taper to trace on to the front pattern. We did this on a miniature pattern piece first, which helped me understand how it worked before going into the real thing and messing it up. I also created two rectangular pattern piece for my waist band: waist measurement x 6cm.


4. Then using these pattern pieces I sewed up my toile, and fitted them to my model. During the fitting I realised I needed to take in the sides a tiny but over the hips, and a lot at the knee, so that they would look fitted. I also made them 13cm shorter so they would look more like traditional recency breeches. I translated what I had taken in onto my patterns, making sure that my pattern pieces matched up before cutting out the new ones. Also seen as I am doing a fall front I added a block that measured 3cm by 10.5cm.


The Next step of the process was designing my breeches. After researching the characters of Commedia dell'Arte I decided to chose the character of Il Capitano to make my breeches for. In the play he is usually a deceitful, braggart soldier, dressed in a bright and colourful uniform. He tends to be boasting about all his exploits in the war, which is thought to be a load of nonsense and lies.
From this information I decided for my breeches to be made up of red, whit, blue, and yellow stripes, like traditional regency uniform. I will also have gold braid, and buttons going all the way down either sides of the legs to make the costume slightly extravagant and colourful. Also I plan to use fabric manipulation to create a pattern in the blue strip.

5. The next step was dying my fabric. I cut the calico into strips before dying it, so I didn't dye an excess of fabric, however I did add a couple of inches to the strips so that I definitely had enough. I wanted to use natural dyes to dye my fabric as I want to decrease my negative impact on the environment.
Firstly I washed my fabric then I mordanted it by submerging the fabric in warm water, then adding 18g of Alum Acetate (as the weight of goods was 300g) and leaving it overnight.
I then used a wheat bath to get any excess mordant out, this ensures the colours you get are nice and bright. To do this I added hot water to 100g of wheat bran, left it for 5 minutes, then sieved it and washed the fabric in it.
The fabric was now ready dye. For the yellow I used onion skins and a tsp of turmeric. For the red I used 10g of madder, and for the blue I used a chemical dye as blue is a difficult and time consuming colour to achieve.
Although my red turned out to be more of a coral colour, I didn't mind as I love how all the colours work together.


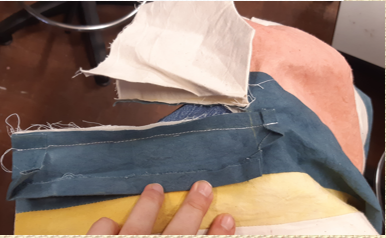
6. After this I worked out how big my stripes would need to be by measuring the widest past of the pattern and dividing it up. I calculated that each strip would be 9cm each, apart from the yellow strip which would be 3cm. I then added a 2cm seam allowance to either side before cutting them out an sewing them together.
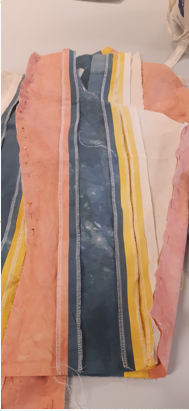
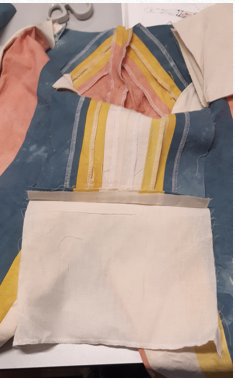
7. Once I had created my striped material I cut my pattern pieces from it, making sure that the centre line ran parallel with the stripes, and that the stipes were in the same position on each pattern piece.


8. Cut out the pieces for the fall front. Make a cut from the top 14cm down both legs that’s parallel to the stripes and 14cm away from the centre. Cut down each leg cm. Apply a small amount of fray check to the bottom of each cut, Then attach the outer fabric of the tab to the outer side of the cut. Then turn inside out and slip stitch lining covering up the raw edge of the cut. Cover the other slide of the cut with a placket that when folded is 2cm wide. Stitch side of placket ½ inch from cut edge. Fold raw edge underneath fold and slip stitch. Use a running stitch to stich a line at the bottom of the cut to attach the placket and tab together.

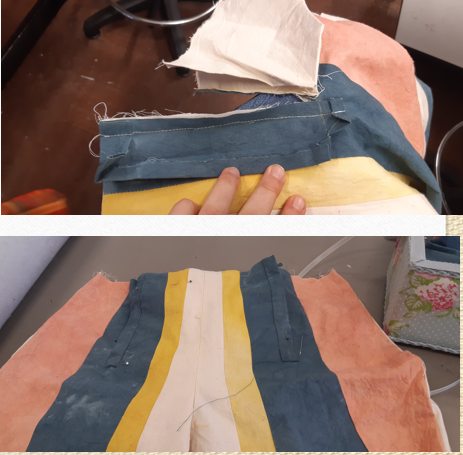
9. Cut out four pocket bags, attach pink strip 1 inch in width (not including seam allowance) to one side. Attach to each pattern piece 10cm down. 10. sew all trousers together, sew round pocket bag as you go down. Make sure to stop where buttons will go.

11. Sew trousers all together. Sew down each side of each leg first (sew round pocket bag as you go down the outer leg). Make sure to stop 21 cm before the bottom, as this is where buttons will go. Sew both legs together. But stop 6cm from the top of the back, as this is where the gusset will go


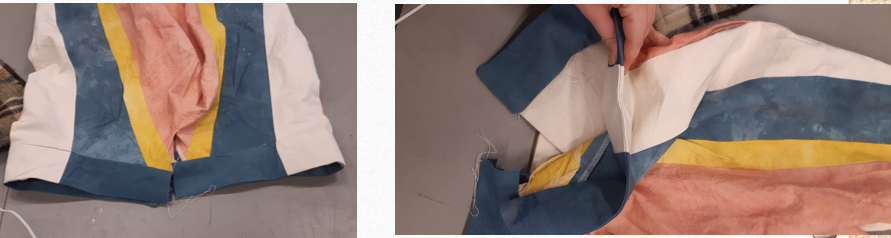
12.Now you can cut out the fall front lining as you know the size, and can now attach it in one piece. Stitch the top of the lining to the top of the trousers and bag out. Overlock the bottom edge. The other edges will be covered by the placket. Cover the other slide of the cut with a placket that when folded is 2cm wide. Stitch side of placket ½ inch from cut edge. Fold raw edge underneath fold and slip stitch. Use a running stitch to stich a line at the bottom of the cut to attach the placket and tab together.


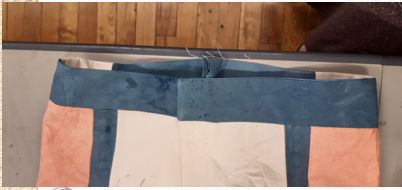
13. •Attach the waistband to the top of the breeches.
•Cut a triangle on the fold that’s 10cm wide and 8cm long. Sew one half of the diamond to the outside, then slip stitch the other half into the inside
14. Create two cuff pieces that are 54cm x 16cm. With right sides together stitch the cuff 6cm up from the bottom of the leg. The turn and slip stitch the inside. In a similar way you attached the placket on the fall front, attach a placket and a facing to the slits at the bottom of the trousers. One pattern piece is a rectangle 8cm x 26cm, the other 12cm x 26cm.
15. In a similar way you attached the placket on the fall front, attach a placket and a facing to the slits at the bottom of the trousers. One pattern piece is a rectangle 8cm x 26cm, the other 12cm x 26cm.

16. •Create all button holes, attach buttons and decorative braid.
•Add eyelets to the gusset, and a braid to lace it up.

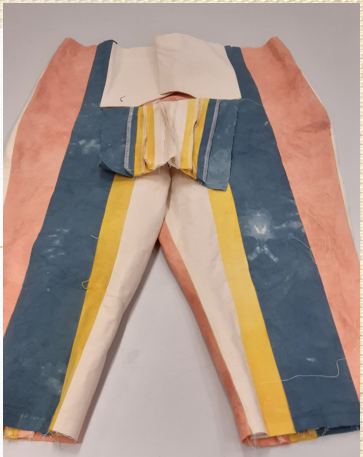
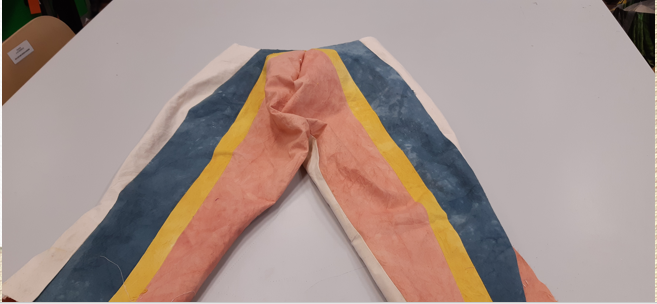
Overall, I am really pleased with how my breeches turned out as the pattern matching is very neat, with the stripes joining correctly at the front and the back, and also on the waist band. I also love how the natural colours work together, and how even the chemically dyed blue fits in well. The only mistake I made was having the button holes the wrong way round on the top of the fall front. Button holes need to be parallel to the direction they are being pulled so they are strong. I would also use a different type of gold braid that wouldn’t fray when I sew it, resulting in a more polished finish.
References


Comments